This tutorial introduces different ways to read media files into an HTML5 Canvas element using JavaScript. The Canvas node is powerful tool that helps us to develop different kind of web applications.
The purpose of the Canvas element
The canvas element can render images, vector graphics and other visual content on the fly. It is applicable for games, graphics applications, graphs, animation, data visualization and so on.
The Canvas API provides the ability to draw graphical content using JavaScript and the HTML <canvas> node. It allows convenient work with 2D graphics and images. Best of all, the API is full-featured and enables hardware-accelerated image processing via Web GL.
What media files does canvas accept?
The HTML5 canvas element gives an suitable access to raw image data from different media types. Today, every modern browser supports the following image files: JPG, PNG, WebP, SVG, GIF and more. In addition to photos, the web environment allows the use of video files such as: WebM, MP4, MKV, etc.
The canvas itself doesn’t work directly with media files. To draw an image, you can use any of the following sources:
| Source | Description |
|---|---|
| HTMLImageElement | The HTMLImageElement interface represents an HTML <img> tag element. |
| SVGImageElement | The SVGImageElement interface represents and HTML <svg> tag element. |
| ImageBitmap | ImageBitmap represents a BITMAP image that we can draw on the Canvas in an optimal way with reduced latency |
| HTMLCanvasElement | HTMLCanvasElement provides properties and methods for manipulating raw image data via the canvas API. |
| OffscreenCanvas | The OffscreenCanvas provides an optimized Canvas API that is not bound to the DOM. This is still an experimental web feature that you should use with caution in production. |
| HTMLVideoElement | The HTMLVideoElement interface provides special properties and methods for manipulating video content. |
| TypedArray | TypedArray contains raw image data that we can use on canvas through various API methods. |
| VideoFrame | The VideoFrame interface is an experimental feature that represents a frame of a video. It is part of the new Web Codecs API. |
In this article, we will briefly review different methods of loading a picture or video frame into a javascript canvas.
How to read image data from external file?
Let’s say we have an <input> element through which we want to select a photo to process. The following snippets shows how we can do this in pure JavaScript.
<input type="file" accept="image/*,video/*"/>Note: For simplicity, we will omit complex error handling and data validation.
Convert file object to URL
An easy approach to create a JavaScript Image object from a File is to use the URL.createObjectURL() method. Note that you must free the browser data via the corresponding URL.revokeObjectURL.
const input = document.querySelector('input[type=file]');
input.addEventListener('change', function(evt){
  var source = evt.target.files[0];
  const image = new Image();
  image.onload = function(){
    drawFrame(this);
  }
  image.onerror = function(){
    console.log("error loading image!");
  }
  window.URL.revokeObjectURL(image.src);
  image.src = window.URL.createObjectURL(source);
}, false);
Using the FileReader API to process images
An alternative approach to get image data from File is to use the FileReader API. The sample JS code below illustrates this.
const input = document.querySelector('input[type=file]');
input.addEventListener('change', function(evt){
  var source = evt.target.files[0];
  const image = new Image();
  image.onload = function(){
    drawFrame(this);
  }
  image.onerror = function(){
    console.log("error loading image!");
  }
  const reader = new FileReader();
  reader.addEventListener("load", () => {
    image.src = reader.result;
  }, false);
  reader.readAsDataURL(source);
}, false);
Process picture data with 2D rendering context
Once we have valid picture data, we can use CanvasRenderingContext2D for direct pixel manipulation. The drawFrame() method shows how to place an image source inside a Canvas element.
function drawFrame(source){
  const canvas = document.querySelector("canvas");
  const context = canvas.getContext("2d");
  canvas.width = source.naturalWidth || source.videoWidth;
  canvas.height = source.naturalHeight || source.videoHeight;
  context.drawImage(source, 0, 0);
  processFrame(canvas);
}
Now we have our data inside a canvas and we can process it. For example we may convert RGB to grayscale image by the following sample code:
function processFrame(canvas){
  const context = canvas.getContext("2d");
  const imageData = context.getImageData(0, 0, canvas.width, canvas.height);
  const data = imageData.data;
  for (let i = 0; i < data.length; i+=4){
    // Use the Y component from YUV for grayscale
    const gray = data[i]*0.3 + data[i + 1]*0.59 + data[i + 2]*0.11;
    data[i] = data[i + 1] = data[i + 2] = gray;
  }
  context.putImageData(imageData, 0, 0);
}
The Canvas API provides advanced image processing and filtering capabilities. Its features are still evolving and web browsers continue to include additional functionality such as the Canvas Filter extension.
Example Result
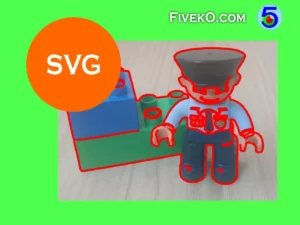
The picture below shows the result of calling processFrame method.

Video processing in Canvas
Generally speaking, the canvas element can handle video in a similar way to still images. However, it is not trivial to process video frame by frame using current web technologies. Below I list some common approaches that web developers use to extract and process video footage.
Let’s say we have a video element as part of the DOM structure.
<video src="sample-video.mp4" controls="true"></video>Now we want to grab video frames and process them to gray-scale as we did before.
Read video by JavaScript timer
JavaScript timers are a handy tool for many web development tasks. They may work for video processing as well. However, we should note that they have some drawbacks such as poor accuracy.
const video = document.querySelector('video');
const frameRate = 30; // Let say 30 FPS
video.addEventListener('play', function(){
  this.width = video.videoWidth / 2;
  this.height = video.videoHeight / 2;
  const timerId = setInterval(function(){
    if (video.paused || video.ended) {
      clearInterval(timerId);
      return
    }
    drawFrame(video);
  }, 1000 / frameRate);
}, false);
Process video frames by ‘requestVideoFrameCallback’
The requestVideoFrameCallback is a new extension of HTMLVideoElement. It is supported by many web browsers, but it is recommended to see the compatibility table in case you decide to use it in production.
const video = document.querySelector('video');
if ('requestVideoFrameCallback' in HTMLVideoElement.prototype) {
  // The API is supported!
  video.addEventListener('play', function(){
  var updateCanvas = function(now) {
    drawFrame(video);
    video.requestVideoFrameCallback(updateCanvas);
  };
  video.requestVideoFrameCallback(updateCanvas);
  }, false);
}
Useful Resources
Conclusion
This article provides an introduction to how to use javascript to process media and read files. It provides an overview of various aspects of the HTML5 Canvas API. Short snippets show examples of how to work with video and photos in a web environment.
Online Image Effects
Some of the tips in this article can help you create online photo effects. I hope you find it useful!


